Advanced JWT Session Management in React and React Native

Authentication is the most important part of any application; one of the most common and secure method of authentication is JWT tokens. Access tokens are used to validate user’s authorisation for the request and the token expires after certain timespan and needs to be updated.
I’m writing this article for every stage of developers, whether you are just getting started with the token management or have already done it several times, I’m going to explain step-by-step process for managing tokens in your react native app in the most clean and easily readable way possible.
Making api request is one thing but using the write library for making api request is more important, Axios is by default the most popular library; it has tonnes of features developers can use and we are also going to use axios for this tutorial.
Creating an API instance (using axios)
Before making api calls, we need an instance of api with our base url to perform basic crud api calls

Understanding Interceptors
When performing an api call, starting from the actions it is performed, before it is sent to the server, it goes through the subscribed interceptors, and same is true for the response When the response is received from the server, it passes through interceptors, and then you receive the response in the then block.
For each request and response, there are two callbacks: onFulfilled and onRejected , If your request is successfully sent to the server, the onFulfilled callback is called; otherwise, the onRejected callback is called. The same is true for the response. If the server sends you an error in response to your API request, the onRejected callback is called, and onFulfilled if the response is successful.
For our implementation, the request oFullFilled and response’s onRejected will be used
Storing Access and Refresh Token
For our use case, the tokens should be persistent, easily accessible, and undateable from anywhere in the code.
For mobile we will use async storage and for web localStorage

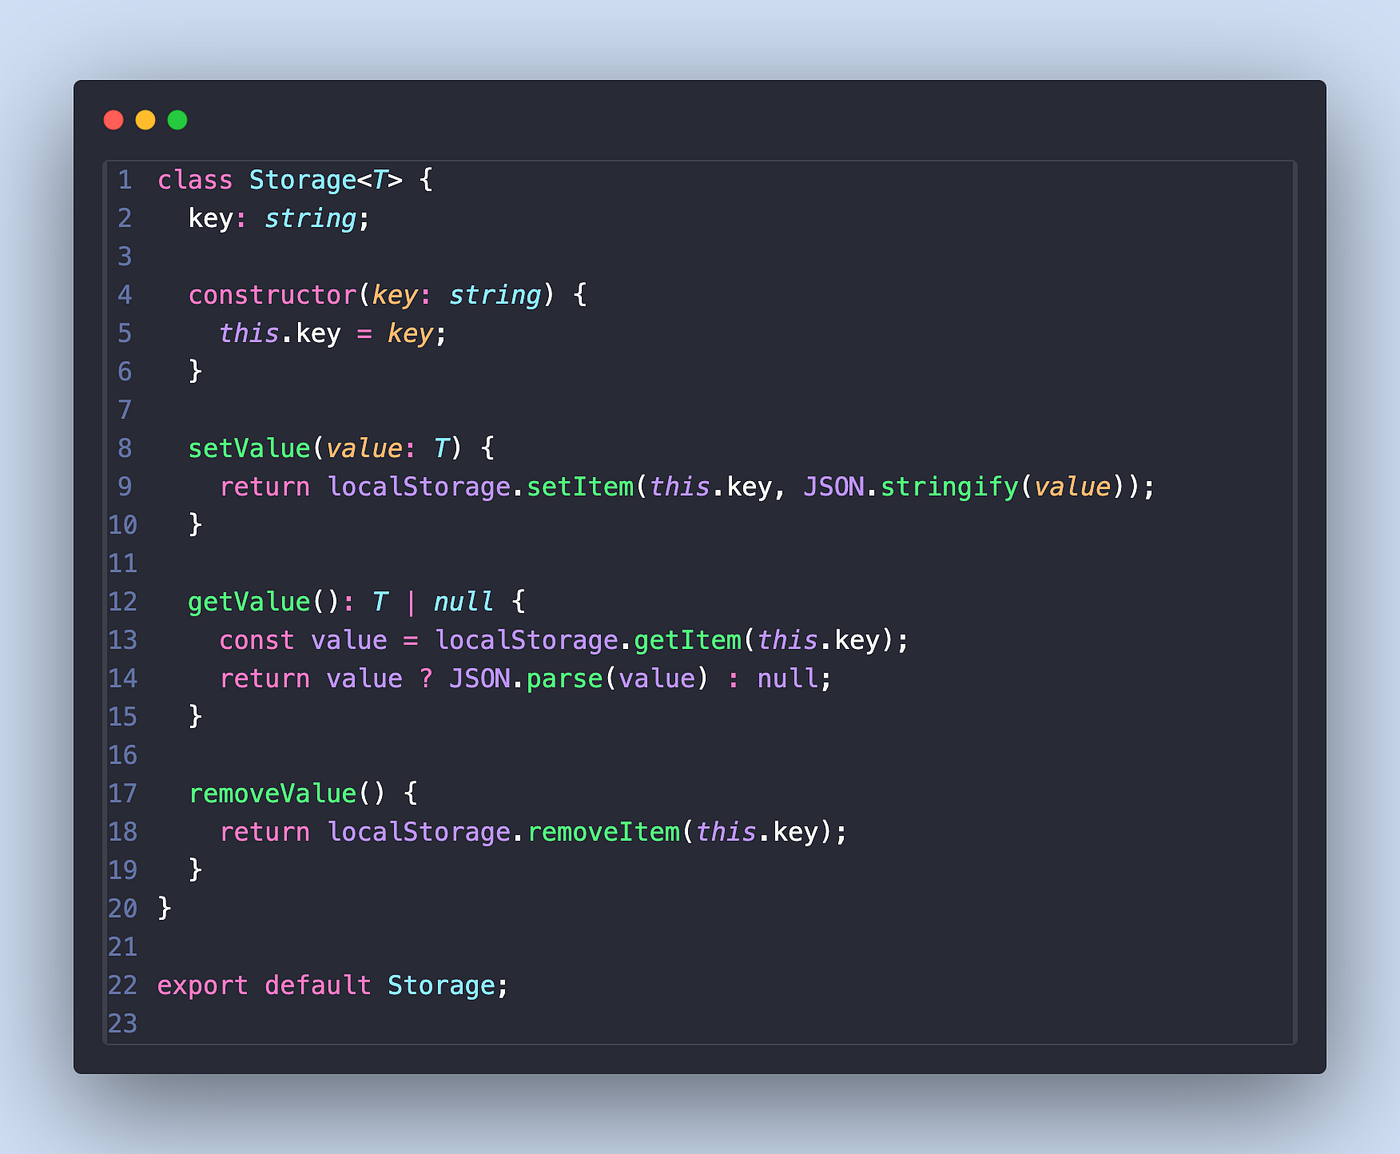
We have created these Storage class for each platform for easily getting and updating the desired key from our persistent storage.
TokenManager Utility Class
We have our Storage apis ready and we can easily create a separate class for managing tokens and performing different types of actions related to tokens
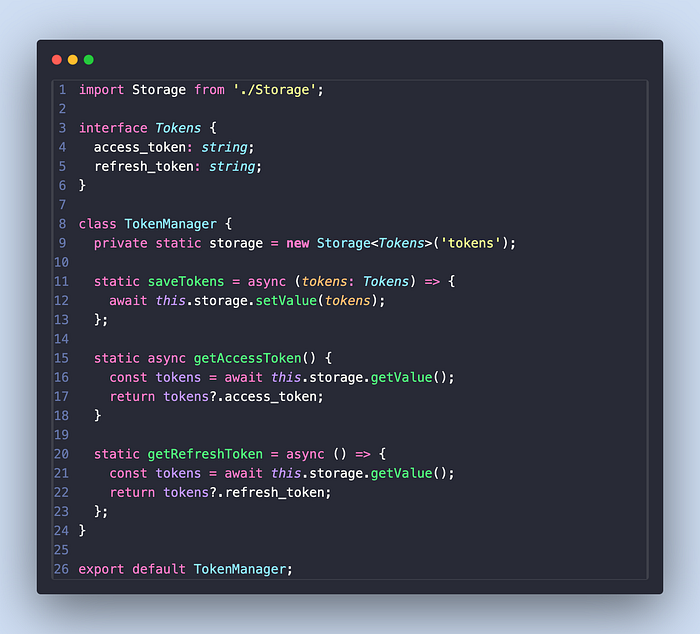
We have created our initial TokenManger class we will update it later in the article according to our use case
Generating Tokens from login api
Once user has provided login credentials, after a successful login, we will receive two tokens: access_token and refresh_token
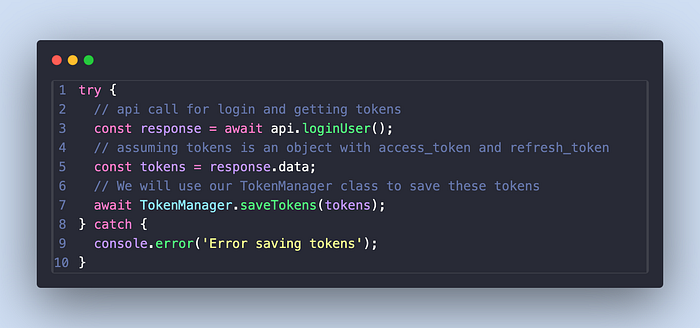
This is a basic example of how you can receive tokens from server, saving the tokens using TokenManger, which is what it is representing
Intercepting request with access token
Since we have already persisted tokens, now we can append the token in each api request to validate user’s authorisation
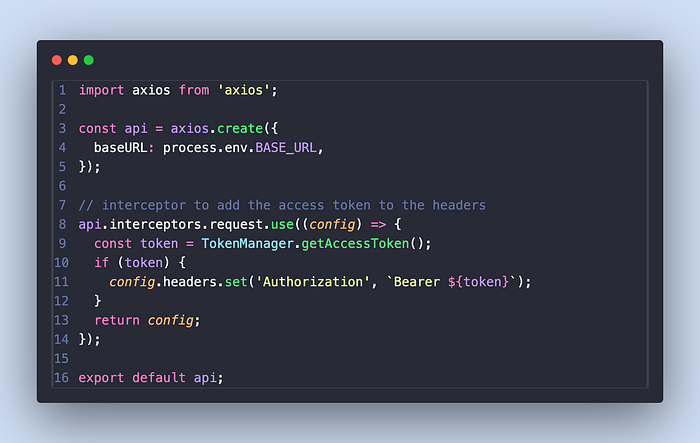
In the above code you can see that how creating a separate classes for Storage and TokenManager helped us to maintain a clean code approach by performing each action separately.
Till now we can completed a basic authorisation for user’s apis now we need to handle when the access_token is expired and we need to generate a new access_token using refresh_token
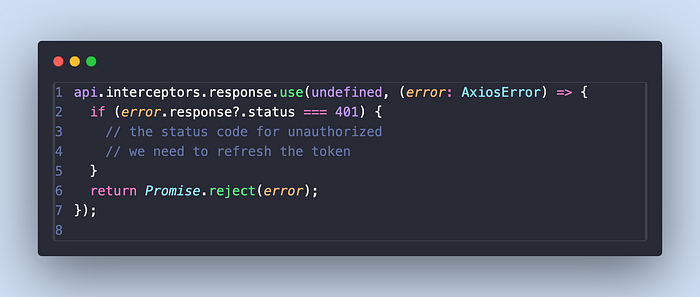
status code 401 tells us that our token is expired or invalid we need to generate a new token or log out the user
Let’s update our TokenManger class with method which will generate a new access_token with the help of our persisted refresh_token
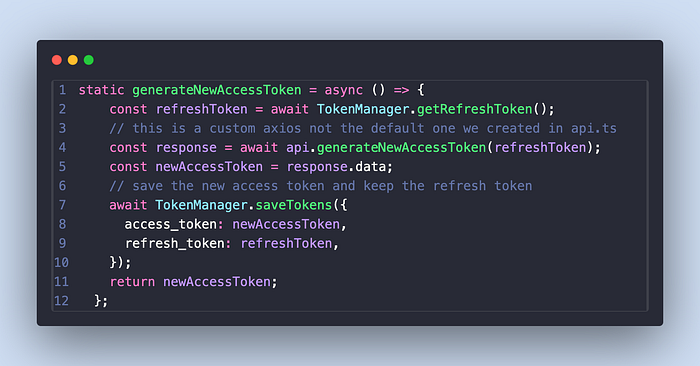
The new method we added generates a new access_token using the refresh_token and persists the new access_token we can now use the newly generated access_token in our failed api
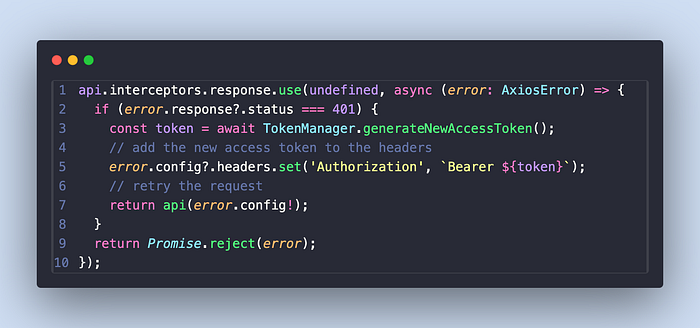
Now all the functions related to generating and persisting the new token are done in generateNewAccessToken method we can just retry the request with the newly generated token
Refresh Token Expired!
The refresh token have a longer lifespan then the access_token but it also expires after a certain timespan.
So when the refresh token expires server is going to throw 401 in the access_token generation request from then we will need to logout the user now
according to our implementation if api request of generating new token fails we can handle that in our interceptor with a catch block
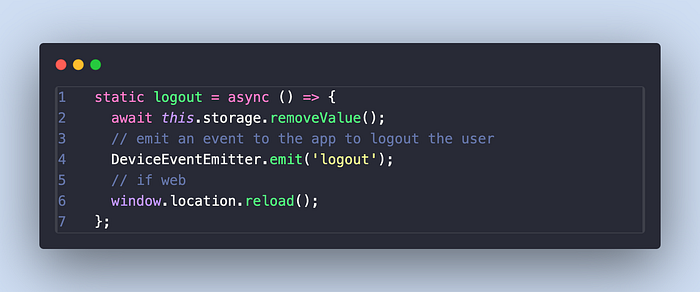
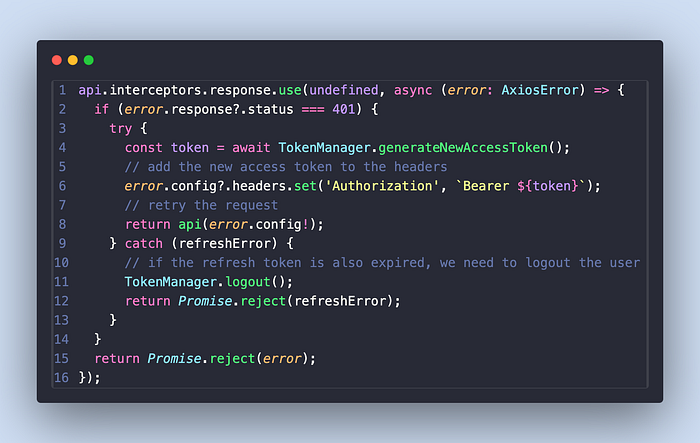
Both of these implementations ensures to log out the user in case of access_token expires
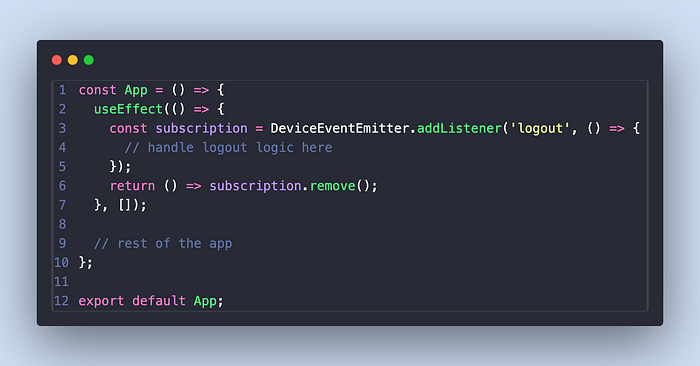
For react native we will need to listen to the logout event some where to logout the user
By this article, you have a basic understanding of intercepting api requests and responses and persisting key value pairs in your app
above code provided in the article is not live code app and is created only for learning purpose
I’ve uploaded a basic example repo you can understand and trace the code properly and then you can successfully implement same in your app
Link to the example: https://github.com/dhruvpvx/token-manager-example